
Disclaimer: Some links are affiliate links, meaning that at no additional cost to you, I will earn a commission if you click through and make a purchase. Please read my disclosure for more info.
How To Start A WordPress Blog
This article will guide you on how to start a WordPress blog on Namecheap very quickly. Blogging can transform your life and enable you to make hundreds, if not thousands, of dollars a month.
The beauty of this business is that you can get started on this money-making blog venture for just a few dollars a month!
As part of a special deal, I have negotiated with one of the top hosting companies, Namecheap.com, so that you can get started now with a very small initial outlay. Take action now to seize this deal, as I am unsure how long these discounted prices might last.
Are you looking to start a WordPress blog on Namecheap? Ensure you read this article in its entirety. By selecting WordPress as your platform and Namecheap as your hosting provider, you’ll be up and running in no time.
I have personally had a great experience with WordPress and Namecheap and highly recommend them as the basis for a successful blogging business.
Running a blog can be a rewarding endeavour. It offers the flexibility to work from home, write anytime, and travel whenever you want. It provides a flexible and independent lifestyle.
Anyone can do it and make money; if you start the right way, you can also make money quickly.
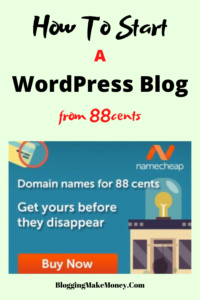
Namecheap ranks among the leading web hosting companies globally, and you can start your web hosting blog for as little as $1.98 a month. Save up to 65% on Stellar & Stellar Plus with promo code (HOST24TSJUL)
A great hosting plan is necessary if you plan to make money from your blog. On your self-hosted blog, you can run your advertisements, affiliate links, direct advertising, etc.
Why Choose Namecheap
Consider Namecheap for your WordPress blog for several compelling reasons. It’s one of the best web hosting providers online. Here are a few reasons why:
- Namecheap offers a user-friendly interface and simplifies creating a WordPress blog with its one-click option.
- Namecheap offers 24/7 technical support.
- Namecheap is highly affordable and offers cheap web hosting.
- WordPress through Namecheap is FREE.
- Namecheap offers a guarantee if you decide it is not for you. If you sign up for Namecheap but are confused for any reason (such as how to set it up, pick a plan, pricing, etc.), there is always help with their 24/7 support.
- You will be self-hosted. If you want to monetize your blog, you need a self-hosted plan.
- Hosting your website on Namecheap can enhance your professional image in the eyes of readers, companies, and other vital stakeholders.
- You get a free SSL certificate.
If you’re interested in launching a blog and want to discover how to get started with a WordPress blog on Namecheap, please read on. Click here to initiate the process.
How to Start a WordPress Blog on Namecheap
- Register your domain name.
To establish your online presence, starting a blog involves purchasing a domain name and creating the blog. Once that’s done, follow the simple steps below to get your blog online.
The first thing you will need to do when starting a WordPress blog on Namecheap.com is to think about what you want your domain name to be, which can be challenging but possible. Think carefully, as your domain name will be your brand. Make sure the domain name relates to the keyword or niche you would like to target.
You can get your domain directly through Namecheap.com, making the whole process easy. Remember, you can qualify for a FREE domain for the initial year when you purchase 12 months of Namecheap web hosting, which makes it worth signing up for at least 12 months of hosting. You will save a lot of money this way.
When you commit to at least 12 months of hosting, you benefit from a reduced monthly rate, and including a free domain adds even more value. Consider opting for a 36-month plan for the best deal, as it offers the lowest monthly rate. If you take advantage of the free domain offer, proceed to the next step, where you can purchase your hosting and secure your free domain simultaneously.
- Buy hosting for your blog.
Choose the Namecheap basic plan or the Stellar Plan. This plan is all you need. If you sign up for 12 months, it’s only $1.98 per month through this link, which is a great price. There is also the Stellar Plus Plan and Stellar Business Plan.
If you are still determining which hosting plan to choose, sign up for the 12-month plan.
If you need help deciding which hosting plan to select, go for the 12-month plan. It’s a fantastic deal and very affordable for a year of blogging. By choosing the 12-month plan, your total cost is just £17.76 per year, which is an excellent value.
The Stellar plan is all you need for now, so don’t worry about the Stellar Plus and Stellar Business plans,unless you are running more than one websites, as they may be slightly more expensive. You can always change it later if the need arises. So, there is no need to sign up for the other plans. Domain Privacy Protection is thrown in, which keeps your contact information safe. You do not need the different items that Namecheap.com sells so that I would uncheck any of the listed extras.
You should purchase at least a 12-month hosting plan rather than month-to-month. The more years you sign up for, the less you pay.
As part of a special deal, I have negotiated with one of the top hosting company – Namecheap.com so that you can get started now for very little initial outlay. Take action now to seize this deal as I am not sure just how long these discounted prices might last for.

Follow These Steps:
When you’re ready to start your blog, follow these steps to buy hosting for your blog:
- Go to Namecheap and click the “Started Now” “button.
- Click on the package you are interested in. You can get started with the Stellar plan.
- Enter the domain name you registered with earlier, or sign up for a new domain name here (Namecheap).
- Enter your personal and payment information.
- Next, you will be asked to enter a password. Make sure it’s secure, as this information is very important.
Connect your domain and hosting.
Once you’ve purchased your domain from Namecheap, you must link it to your hosting account. Namecheap provides a detailed support page to guide you through setting the nameservers for your domain.
Initially, Namecheap will place your domain on its parked nameservers, displaying a temporary page when visitors access your site. After selecting your hosting provider, you can update the nameservers to remove the parked page and activate your domain.
You can modify your DNS Nameservers when you are using Namecheap for your domain and Namecheap for your hosting:
- Log into the Namecheap.com Account Manager.
- Select Manage Domains from the Domain Names menu or the Manage Your Account list.
- Select the domain name you wish to modify using the checkboxes and then click Set Name Servers.
- Enter your updated name server information in the spaces provided under the blue Name Servers heading on the right side of your page and click Save Changes at the bottom. Your entries should look like this:
- dns1.registrar-servers.com,
- dns2.registrar-servers.com.
- dns3.registrar-servers.com.
After purchasing the domain, you will need to proceed by adding it to your account. (through Namecheap) as an add-on domain for your Namecheap web hosting. You can do this by clicking “Domains” when logged into your Namecheap web hosting account and then clicking “Sign.” Follow the steps.
Install WordPress on Namecheap.
After you create your password, Namecheap guides you through exactly what you need to do to start a blog.
Click here to get started:
Yippee! Your WordPress blog is now ready. You must work on the design and create high-quality content, but there’s no rush. Take your time, research, and write great content for your audience.
Now that you have successfully set up your WordPress blog on Namecheap, let’s explore the following steps to ensure that it is fully operational and optimized for success.
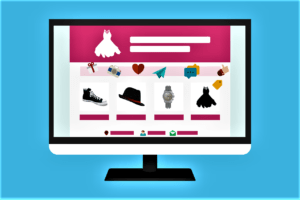
Customise Your WordPress Blog
After installing WordPress, you must customize your blog to make it visually appealing and user-friendly. Here are some steps to follow:
Choose a Theme
- Access Themes: Log into your WordPress dashboard and navigate to “appearance” and “themes.”. Browse Themes: You can browse through the free themes or consider purchasing a premium theme for more features and customization options.
Install and Activate:
Once you find a theme, click “install” and “activate.” Customize Your Theme
- Navigate to Customizer: Go to “appearance” and then” customize.” Modify Settings: Adjust settings such as the site title, tagline, colours, fonts, and more to match your brand.
- Add Widgets: Customize your sidebar, footer, and other widget areas with widgets such as recent posts, categories, and social media links.
- Install Essential Plugins
In WordPress, plugins are powerful tools designed to enhance and expand the functionality of your blog. Here are some essential plugins to consider:
- Yoast SEO: Helps optimize your blog for search engines.
- Akismet: Protects your blog from spam comments.
- WP Super Cache: Improves your site’s performance by caching your content.
- Jetpack: Provides various features such as security, performance, and site management tools.
- Contact Form 7: This plugin lets you incorporate contact forms into your website.
To install plugins:
- Navigate to Plugins: Go to “plugins” and then” “dd New.” Search and Install: Search for your desired plugin, click” “install Now,” and then “activate.” Create Important Pages.
Before you start publishing blog posts, create some essential pages:
- About Page: Share your story and explain what your blog is about.
- Contact Page: Provide a way for readers to contact you.
- Privacy Policy Page: Inform visitors how their data is collected and used.
- Disclaimer Page: Disclose any affiliate links or partnerships.
- Write and Publish Your First Blog Post
Now that your blog has been established, it’s time to start producing content. Here to write and publish your first blog post:
- Add New Post: Go to “Posts” and then” “New.” Create Content: Enter a compelling title and start writing your post. Use headings, images, and links to make your content engaging.
- Optimize for SEO: Use the Yoast SEO plugin to optimize your post for search engines.
- Publish: Once you are happy with your post, click” “publish.” Promote Your Blog
To attract readers to your new blog, you need to promote it. Here are some effective strategies:
- Social Media: Share your posts on platforms like Facebook, Twitter, Instagram, and Pinterest.
- Email Marketing: Build an email list and send regular newsletters to your subscribers.
- Guest Blogging: Write guest posts for other blogs in your niche to gain exposure.
- SEO: Optimize your blog posts for search engines to increase organic traffic.
Monetize Your Blog
Once your blog starts gaining traction, you can begin to monetize it. Here are some popular ways to make money from your blog:
- Affiliate Marketing: You can earn a commission for every sale made through your referral links by promoting products.
- Ad Networks: Display ads on your blog through networks like Google AdSense.
- Sponsored Posts: Write posts for brands in exchange for payment.
- Sell Products or Services: Offer your products, courses, or services directly through your blog.
Related Articles:
- How To Make Money With Blogging
- How To Create A Super Money-Making Machine Online
- How Do Bloggers Make Money
- How To Create A Super Money Making Machine Online
- How To Start A Money Making Blog
Conclusion
Starting a WordPress blog on Namecheap is a fantastic way to share your passion, build an audience, and make money online. While starting a WordPress blog on Namecheap is not entirely for free, you can keep costs to a minimum by utilising promotions and choosing the most affordable plans. This guide helps you start a WordPress blog on Namecheap as cost-effectively as possible. With a small initial investment, you can be up and running, ready to share your content with the world.
The steps outlined in this article can help you set up your blog quickly and effectively. To succeed, remember to focus on creating high-quality content, promoting your blog, and exploring monetization opportunities. Take action now to start your blogging journey. Click here to get started with Namecheap and launch your WordPress blog today! Happy blogging!
FAQ’s
How much does it cost to start a blog on WordPress?
Starting a blog on WordPress can be affordable, especially if you choose budget-friendly hosting options like Namecheap. Here is a breakdown of potential costs:
- Domain Name: Generally, a domain name costs around $10-$15 per year. However, with Namecheap, you can get a free domain for the first year if you purchase a 12-month hosting plan.
- Hosting: The cost of hosting varies depending on the plan you choose. For example, Namecheap’s Stellar Plan costs only $1.58 per month if you sign up for a 12-month plan, totalling around $18.44 annually. More comprehensive plans like Stellar Plus or Stellar Business cost more but offer additional features.
- WordPress: The WordPress software itself is free to use.
- Themes: Many free themes are available, but premium themes range from $30 to $100.
- Plugins: Many essential plugins are free, but some premium plugins may require a one-time purchase or a subscription fee.
Overall, you can start a blog on WordPress for as little as $20-$50 for the first year, especially if you take advantage of deals and discounts. However, additional features and premium options can increase the total cost.
How do I publish my WordPress site to my domain?
When publishing your WordPress site to your domain, you need to connect your domain name to your hosting account and then proceed with installing WordPress. Here is step-by-step guide:
- Register Your Domain: Purchase your domain name through a registrar like Namecheap.
- Buy Hosting: Choose a hosting plan from Namecheap and complete the purchase.
- Set Up Your DDomain’sNameservdomainog in your Namecheap account.
- Navigate to “Domain List” and select the domain you want to connect.
- Click “Manage” “next to your domain.
- Under the “nameservers” section, select” “Namecheap BasicDNS” “if you are using Namecheap for both domain and hosting. If you are using another hosting provider, enter the nameservers they provided.
- Save changes.
- Add Domain to Hosting Account:
- Log into your Namecheap hosting account.
- Go to the “Domains” section and click “Sign a Domain to Your cPanel Account.” Follow the prompts to add your domain.
- Install WordPress:
- Access your Cpanel.
- Look for the “Softaculous Apps Installer” or” WordPress” icon in WordPress.
- Make sure to click on the link and then follow the instructions provided to successfully install WordPress on your domain.
- Configure WordPress:
- Once installed, log into your WordPress dashboard using the credentials set during installation.
- Customize your site by selecting a theme, installing plugins, and adding content.
- Publish Your Site:
- After configuring your site, go to “settings” readingdiscourage” in your WordPress dashboard.
- Remember to make sure that the option “discourage search engines from indexing this site” is not selected.
Click “Save Changes.” Your WordPress site should now be live on your domain. You can share your URL with others and attract visitors to your blog.
First Publish on: Apr 10, 2020 at 15:00